How to Add Google Cloud Printer in Windows
As reported in our forum, Google recently added Windows support for its Cloud Print technology. It means you can natively connect printers to the web and share them with your mobiles, tablets, and no-printer computers. We thought it would be a great idea for everyone and therefore here is a guide explaining to you how to install Google Cloud Print on Windows.
Why You Should Install Google Cloud Print
If you frequently print documents and images, then it can prove very useful. Google Cloud Print lets you –
#. Share printers with friends and co-workers
#. Print from any device like mobiles (Android and iOS), tablets, and laptops
#. Print without leaving applications
Consider these two cases –
1) Suppose you have a document on your mobile that you want to print. Without Google Cloud Print, you would first save it on your mobile, and then transfer it to a computer that has a printer connected to it and then finally print it. With Google Cloud, you can directly command your phone to print at any of the shared printers.
2) Suppose you clicked a picture with your iPhone and want to get it framed. With Google Cloud Printer, you can directly print on the shop's printer without actually going there.
As you can see, Cloud Printer makes your task easy by removing extraneous steps. If you are amongst the ones that print files in day-to-day life, then you should seriously think about this technology.
Google Cloud Print Setup
Before installing, we need to understand new offerings –
#. Google Print Driver – Install this if you want to add Google Cloud Printer to your Windows printers list.
#. Google Print Service – Install this if you want to add your existing printer to the Cloud Print network.
Let us do a quick revision for the sake of clarity.
Install Service if you have a printer and want to connect it to the web. The Service will make the printer available on your Google account and will let you share the printer. Install driver if you want to don't have a printer and want to add Google Cloud Print to your printer list.
Installing Google Cloud Service
The following steps will add your printers to the Google Cloud network –
1) Download Service from here.
2) Run the downloaded service installer.
3) Launch the application and use the Windows username and password on the initial screen.

This step is really tricky. The program does not tell you which credentials to enter. Most of the people would have guessed Google account credentials. But actually, you need to put Windows username and password with the computer name. If you do not know this, navigate to User Accounts in the control panel.
4) The application now opens Chrome and will ask your permission to add all the printers connected to this server.
5) After granting the permission, all your local printers will now be listed under the Cloud network. If you want to remove any of the printers, you can do that manually from the Cloud Print control panel.
Installing Google Cloud Driver
Following steps will add Google Cloud Printer to your list of printing devices –
1) Download the driver from here.
2) Run the downloaded driver installer.
3) Authorize the app and you are done.
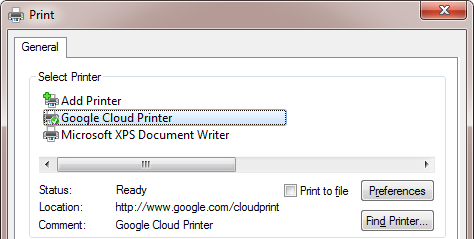
You will now find Google Cloud Printer as one of the printers in your Windows.

Now whenever you select this printer to print any of your documents, a Chrome pop-up will open with a list of cloud printers on which you can print.
Though we did not like the dependence on the Chrome browser, we absolutely loved the cloud printing technology. It can really benefit you in many ways. If you have any trouble, let us know in the comments.
How to Add Google Cloud Printer in Windows
Source: https://www.gtricks.com/google/install-google-cloud-print-on-windows/